Sewer Leak Detection With Biodegradable Tracer Dyes (Uranine)
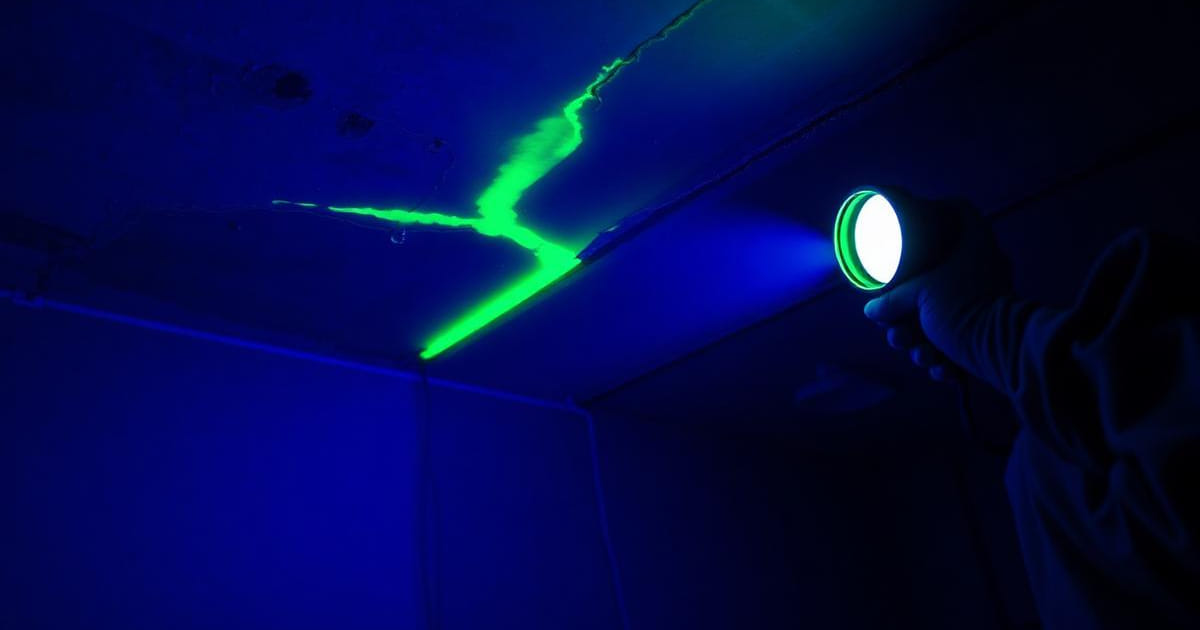
There is a classic scenario in apartment blocks in Funchal, Caniço and Santa Cruz: a stain appears on the downstairs neighbour's ceiling, everyone knows it comes from the bathroom above, but nobody knows whether it is the shower, the basin, the toilet or the kitchen branch. The temptation is to break floors and tiles until something turns up. The correct approach is different: use biodegradable tracer dyes, test each appliance in isolation and let the fluorescence say exactly which branch is faulty. It is fast, cheap and avoids unnecessary demolition.
🔎 Symptoms & Initial Diagnosis
1) A damp patch on the ceiling or wall that appears or grows only at certain times of day — typical of a waste leak rather than a pressurised pipe. 2) The water meter stationary with everything closed: confirms there is no supply leak. 3) A slight sewer smell around the damp area. 4) Damp that worsens right after showers, toilet flushes or appliance cycles. 5) Several bathrooms or appliances connected to the same run, making it impossible to deduce the source by observation. 6) That is where tracer dye testing comes in: it turns a guess into a documented diagnosis.
🧪 How the Tracer Works
1) Uranine (sodium fluorescein) is a biodegradable dye, non-toxic at the concentrations used, with extremely intense fluorescence: a few grams colour hundreds of litres. 2) Diluted in water, it travels along the waste branch exactly like wastewater, passing through cracks, badly glued joints and broken unions. 3) On reaching the leak zone it deposits into the material — render, concrete, slab or insulation. 4) Under ultraviolet light even minimal traces glow fluorescent green, visible to the naked eye in a darkened room. 5) Using different colours (green uranine, red rhodamine, blue dyes) several appliances can be tested in one visit without confusing results. 6) The test damages no pipework, requires no water shut-off and is fully compatible with septic tanks and the public network.
🛠️ Practical Step-by-Step
1) Preparation: photograph the damp area and darken the room where the stain shows. 2) Isolation: avoid using every appliance so only one is tested at a time. 3) First test: dilute the dye in a specific colour and pour it into the shower drain, followed by enough water to flush the branch. 4) Observe with UV light in the damp area at 15 to 60 minute intervals, depending on distance and material absorption. 5) Repeat with another colour at the basin, then the toilet and finally the kitchen sink or appliances. 6) Record: photograph each result with and without UV light, building a report with visual evidence. 7) Surgical intervention: open only the identified section, repair it and repeat the test to confirm tightness.
🎯 Definitive Technical Solution
1) Use high-visibility biodegradable tracer dyes — uranine or fluorescein — diluted in water at a concentration matched to the branch volume, with no risk to the sewer network, septic tanks or treatment plants. 2) Apply a different colour at each individual discharge point: shower, basin, bidet, toilet, kitchen sink and appliances. Under ultraviolet light the exact leak point glows intensely in the damp area, identifying beyond doubt which branch is faulty. 3) That allows a surgical intervention only where it is needed, with no blind tile demolition and no lifting an entire shower tray on suspicion. 4) The method combines very well with thermal imaging and CCTV inspection: thermography shows the wet area, the tracer confirms the source and the camera shows the defect inside the pipe. 5) The result is a report with visual evidence — a decisive document in insurance claims, condominium disputes and liability between neighbours.
🚫 What to AVOID
1) Do not use ordinary food colouring or paint: they stain surfaces, fluoresce poorly and may be undetectable in traces. 2) Do not pour dye into several appliances at once — you lose all ability to isolate the source. 3) Do not end the test after five minutes: through thick slabs migration can take over an hour. 4) Do not break tiles 'to see better' before the test is finished. 5) Do not use excessive concentrations in homes with septic tanks without prior assessment. 6) Do not run the test without photographic records: undocumented results carry little weight with insurers and condominiums.
🧰 After the Detection
1) Repair the identified branch with compatible material and redo the joints along the whole suspect run, not just the visible point. 2) Use the opening to check pipe falls and supports, frequent causes of fatigue failure. 3) Repeat the tracer test after the repair to validate tightness. 4) Dry the affected area completely before rendering and painting. 5) Hand the photographic report to the condominium or insurer. 6) In buildings with a history of leaks, schedule a preventive inspection of the remaining branches.
FAQ
Does uranine stain tiles, shower trays or sanitaryware?
At leak detection concentrations it leaves no permanent stain on glazed surfaces such as ceramic tiles, sanitaryware or acrylic: it rinses off with water. On porous, unsealed materials such as exposed concrete, natural stone or degraded grout a temporary trace can remain — which is why the test is always run with controlled application and immediate rinsing of visible surfaces.
Does this method work for leaks in pressurised supply pipes?
It is not the right method. Tracers rely on gravity flow, which makes them ideal for waste pipes, drains, gully traps and shower trays. For leaks in pressurised supply pipework we use pressure testing with a gauge, acoustic geophones, tracer gas and thermal imaging. In many cases we combine both families of techniques in one visit until the source is isolated with certainty.
Leak with no identified source? We run tracer dye detection with UV light.
We carry out sewer leak detection with tracer dyes and UV light in Funchal, Câmara de Lobos, Caniço, Santa Cruz, Machico, Ribeira Brava, Ponta do Sol, Calheta, Santana, São Vicente and Porto Moniz, across Madeira Island.