Rising Damp (Capillary Action) on Ground Floors: How to Identify It Without Breaking Walls
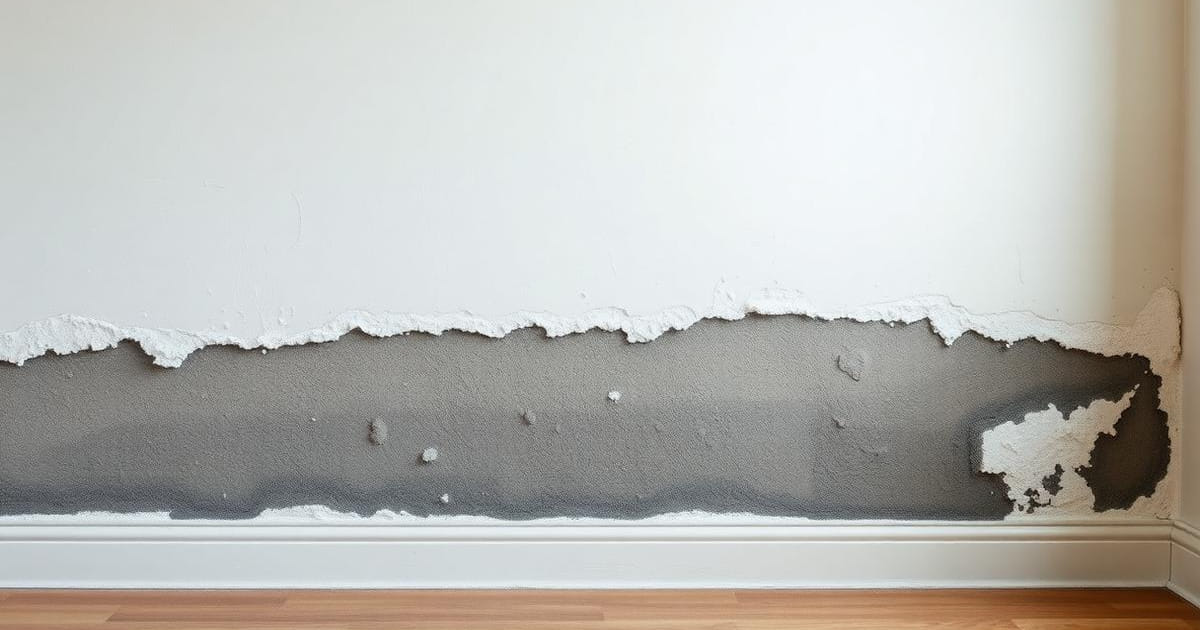
In ground-floor homes in Funchal, Câmara de Lobos or Machico, the stain climbing above the skirting is almost always mistaken for a water leak. It usually is not. In most cases it is capillary action: ground water rising through the pores of the masonry because a damp-proof barrier between soil and wall never existed — or has already failed. The distinction matters, because a leak is repaired in hours while rising damp needs a damp-proof course. This guide shows how to identify the origin with instruments, without opening a single wall.
💧 The Mechanism: Why Water Climbs the Wall
1) Old masonry is porous: stone, lime and brick behave like a bundle of fine capillaries. 2) When the ground is wet, surface tension pulls water upwards against gravity, typically 40 to 120 cm. 3) The rise stops where evaporation matches the capillary flow — that is what creates the characteristic horizontal line. 4) The water carries soil salts; as it evaporates it leaves them crystallised on the surface (efflorescence). 5) In Madeira's stone houses, the absence of a membrane or chemical barrier at foundation level is the rule, not the exception. 6) Sloping ground, infiltrated irrigation channel water or missing perimeter drainage feed the process permanently.
🔍 Visual Signature: Capillary vs Leak vs Condensation
1) Capillary: a stain rising from the floor with an approximately horizontal, constant upper limit, salts and blistered paint. 2) Pressurised leak: a localised, often circular stain with an intensely wet centre that evolves within days. 3) Drainage leak: an intermittent stain that grows after use, frequently with odour. 4) Condensation: surface patches in cold corners, ceilings and behind furniture, with black mould and no salts. 5) Lateral infiltration (retained ground): a high, irregular stain that worsens only with rain. 6) Two pathologies often coexist — which is why we measure instead of assuming.
📏 Contact Moisture Meter: How to Use It Properly
1) Use deep measurement (electrode or capacitive) rather than surface readings, which paint distorts. 2) Build a grid of points: every 20 cm in height from the skirting to 150 cm, and every 50 cm along the wall. 3) Record values on a simple room sketch — the pattern is the diagnosis, not any single figure. 4) Capillary action gives a decreasing gradient from bottom to top, with a gradual transition. 5) A leak gives a local peak, with high values around one point and a rapid fall in all directions. 6) Repeat readings 7 to 10 days later: rising damp is stable, a leak progresses.
🌡️ Thermography: What the Camera Sees (and What It Does Not)
1) A thermal camera does not see water: it sees surface temperature differences caused by evaporation. 2) Damp zones appear colder, with an outline that lets us map the real extent of the stain. 3) The best moment is during a thermal swing — early morning, or after heating the room — because contrast increases. 4) For hot water pipework, thermography locates the route and leaks to within centimetres. 5) Common false positives: cold risers, structural thermal bridges and furniture just moved away. 6) Thermography maps; the meter confirms; meter reading and pressure testing close the diagnosis.
🧪 Complementary Non-Destructive Tests
1) Meter test: close every outlet and check whether the water meter turns — that alone separates a leak from capillary action. 2) Pressure test on the branches, with a gauge, to confirm the pressurised network is sound. 3) Ambient hygrometer logging temperature and relative humidity over 48 hours, to assess condensation. 4) Salt analysis (nitrates and chlorides) in the efflorescence: significant salts point to a soil origin. 5) Micro-hole endoscopy inside wardrobes or service areas when we must look inside without damage. 6) Only after this set do we decide to open up — at one point, with a defined objective.
🛠️ Treatments and What to Expect from Each
1) Chemical damp-proof course by injecting silane/siloxane cream or resin at the base of the wall — the usual solution in existing masonry. 2) Macroporous sacrificial render to manage salts through the drying phase, which takes months. 3) Perimeter drainage and external run-off correction, to cut the water supply to the footing. 4) Room and floor ventilation, to speed drying and prevent associated mould. 5) Never apply impermeable plastic paint on a drying wall: it blisters and pushes the stain higher. 6) Want a mapping survey with meter and thermal camera before any works? Message us on WhatsApp.
FAQ
How do I know whether it is rising damp or a hidden leak?
Rising damp climbs from the floor with a stable horizontal limit and leaves salts; a leak produces a localised peak that progresses within days. A meter test plus two measurement series 10 days apart settles it.
Do walls need to be opened to confirm?
In most cases no. A deep moisture meter, thermography, hygrometry and a pressure test close the diagnosis. We open up only when a specific point must be confirmed.
After treatment, how long does the wall take to dry?
Allow 1 to 2 months per centimetre of thickness in ventilated conditions. In a 40 to 60 cm Madeira stone wall, full drying can take more than a year.
Is rising damp covered by home insurance?
Usually not, as it is treated as a building defect rather than sudden damage. A pipe leak normally is — another reason to establish the origin with an instrument-based report.
Stain climbing above the skirting? We map it with a moisture meter and thermal camera before any works. Message us on WhatsApp.
We work in Funchal, Câmara de Lobos, Caniço, Santa Cruz, Machico, Ribeira Brava, Ponta do Sol, Calheta, Santana, São Vicente and across the whole island of Madeira.