Water Leak Infiltration or Condensation? How to Tell the Difference
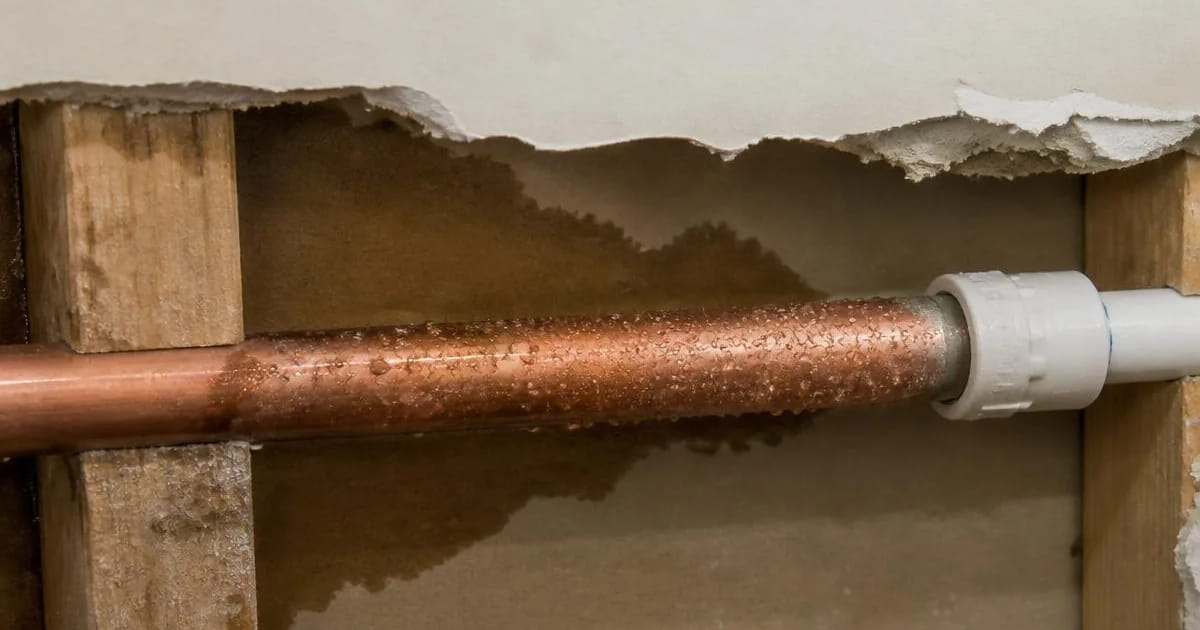
There is a scenario that repeats every summer in Madeira homes: a dark patch appears on a wall or plasterboard ceiling, exactly along the route of a pipe. The owner assumes a burst pipe, shuts off the water and calls a plumber — and the pressure test shows zero leaks, the meter is completely still and the system holds pressure for hours. There is no leak at all. What exists is interstitial condensation: the cold water pipe is “sweating” inside the wall because its surface is colder than the dew point of the humid air surrounding it. This is a building physics problem, not a plumbing failure, which is why replacing pipes never solves it. At Canalizador Funchal® we have diagnosed and treated these cases for years: the answer is correct insulation, a vapour barrier and ventilation, not chasing a hole that does not exist.
💧 The Symptom: Damp Without a Confirmed Leak
The signature of a false leak is distinctive and easy to separate from a burst. 1) The stain follows the pipe run faithfully, forming a linear band rather than a circular halo radiating from one point. 2) The water meter is motionless with every tap closed, even overnight. 3) A pressure test holds steady for 30 to 60 minutes with no drop whatsoever. 4) The damp worsens in summer and on muggy days and nearly vanishes in the dry winter — the opposite of a leak, which is constant. 5) The staining is strongest in high-humidity rooms: bathrooms, kitchens, laundry rooms and basements. 6) The surface feels damp and cold to the touch, but water never runs or pools on the floor. 7) Plasterboard swells and grows surface mould instead of disintegrating into soaked fragments as it does with a genuine burst.
🌡️ Thermal Shock and Dew Point: The Physics Behind It
The phenomenon is fully explained by the relationship between surface temperature and air humidity. 1) Air holds a limited amount of water vapour depending on its temperature; as it cools it reaches the dew point, where vapour turns back into liquid. 2) Mains water reaches Funchal at roughly 15 °C to 19 °C, arriving from high-altitude sources and buried mains. 3) In a bathroom at 26 °C with 75% relative humidity, the dew point sits around 21 °C: any surface below that condenses. 4) A cold water pipe at 17 °C is clearly beneath that threshold and becomes a permanent condensing surface. 5) Every hot shower injects litres of vapour into the room and spikes relative humidity within minutes. 6) The condensed water runs down the pipe inside the wall, saturates the plaster or render and surfaces as a visible stain. 7) Thermal shock is greatest when a tap is opened after hours of standing: the sudden arrival of fresh water chills the pipe abruptly and triggers a condensation peak.
🏗️ Installation Error: The Insulation Sleeve That Was Never Fitted
The root cause is almost always an omission during construction. 1) The technical rule is unambiguous: every embedded or ceiling-void cold water pipe must carry closed-cell insulation sleeving (elastomer or neoprene). 2) Closed cells matter because they neither absorb water nor allow vapour through — that is what keeps humid air away from the cold pipe. 3) On many sites only the hot water is insulated “to avoid heat loss”, leaving the cold pipe entirely bare — precisely the one that condenses. 4) Rock wool or open-cell foam is sometimes used; it soaks through, loses its thermal resistance and makes the problem worse rather than better. 5) Thickness is undersized: 6 mm is not enough in humid environments, where 9 to 13 mm is required depending on design humidity. 6) Joints and end caps are left unsealed without adhesive and proper tape, creating local thermal bridges where condensation concentrates. 7) Cold pipes are run touching hot pipes or extract ducts, creating thermal gradients that intensify the effect further.
🔬 Differential Diagnosis: Condensation or a Real Leak?
Before any construction work, the origin must be confirmed. 1) We close the main stopcock and read the meter several hours apart: an identical reading rules out a leak on the system. 2) We run a pressure test with a needle gauge, isolating sections — stable pressure confirms pipe integrity. 3) We use a psychrometer/hygrometer to measure air temperature and relative humidity and calculate the room's actual dew point. 4) We compare that figure with the surface temperature measured by infrared thermometer on the pipe and the wall. 5) The thermal camera reveals a linear, uniform cold pattern (condensation) instead of a diffuse branching plume (pressurised leak). 6) A pin moisture meter maps moisture content in the plaster: with condensation the gradient is superficial and consistent along the pipe. 7) When doubt remains, we deploy a ground microphone/correlator: a pressurised leak produces a characteristic noise that condensation never generates.
🛠️ Professional Technical Solution: Insulation, Vapour Barrier and Ventilation
An effective repair addresses the physics, not the pipe. 1) We open only the strictly necessary section, guided by thermography, avoiding blind demolition. 2) We dry the substrate with a dehumidifier before closing up, ensuring no residual moisture is trapped in plaster or render. 3) We fit closed-cell elastomeric sleeving with the thickness calculated for the local dew point, typically 9 to 13 mm. 4) We seal every longitudinal joint and end cap with dedicated adhesive and aluminium tape, forming a continuous, airtight vapour barrier. 5) We separate cold pipes from heat sources and ensure the chase leaves enough clearance so the insulation is never crushed. 6) We treat the substrate with a fungicide and rebuild the finish with moisture-resistant board and vapour-permeable paint. 7) We improve room ventilation — timed mechanical extraction in the bathroom, air inlet grilles and, if needed, dehumidification — to bring relative humidity down structurally.
⚠️ Mistakes to Avoid
Many interventions fail because they attack the effect rather than the cause. 1) Do not break open walls hunting for a leak before running a pressure test and a meter reading. 2) Do not replace sound pipework: the new pipe will condense in exactly the same way. 3) Do not paint the stain with impermeable plastic paint — it traps moisture inside and the plaster rots behind it. 4) Do not use open-cell foam or mineral wool on embedded cold water pipes. 5) Do not leave sleeve ends unsealed: one open joint cancels out the insulation work along the whole run. 6) Do not close walls while the substrate is still damp — mould returns within weeks. 7) Do not ignore ventilation: without lowering relative humidity, even the best insulation works at the edge of its performance.
🗓️ Prevention in Madeira: Humid Climate and Coastal Homes
The island's climate makes this pathology especially common and worth preventing actively. 1) High relative humidity for much of the year, particularly on the south coast in summer, keeps dew points high. 2) In internal bathrooms with no window, every shower pushes humidity above 85% for a long stretch. 3) We recommend mechanical extraction with a 15 to 20 minute overrun timer instead of simply opening the door. 4) On new builds and refurbishments we specify closed-cell insulation across all cold water as a project requirement, not an optional extra. 5) In basements and garages, where ventilation is poor, we increase insulation thickness. 6) It is worth monitoring relative humidity with a simple hygrometer and keeping it between 45% and 60%. 7) Our maintenance plans include periodic thermographic inspection of risers, catching condensation before the stain ever appears.
FAQ
How do I know whether it is condensation or a real leak?
Close every tap and read the meter a few hours apart. If the reading does not change and the pressure test holds, there is no leak: the damp comes from condensation on the cold pipe surface, confirmed with a hygrometer and a thermal camera.
Why does the stain only appear in summer?
Because condensation depends on air humidity and temperature. In summer the air is warmer and more humid, the dew point rises and the cold pipe surface starts condensing. In a dry winter the same pipe may not condense at all.
Is anti-damp paint enough?
No. Paint only hides the symptom for a few weeks and, if impermeable, makes things worse by trapping moisture inside the substrate. The fix is closed-cell pipe insulation plus better ventilation.
Does the whole wall have to be opened?
No. Thermography and moisture readings let us delimit the affected section and open only what is needed to fit the insulation and vapour barrier, keeping the works and reinstatement cost to a minimum.
Damp patch with no confirmed leak? Talk to us on WhatsApp.
We work in Funchal, Câmara de Lobos, Caniço, Santa Cruz, Machico, Ribeira Brava, Ponta do Sol, Calheta, Santana, São Vicente and across the whole island of Madeira.